Running a CBD business online is not just about having a beautiful storefront. You also have to stay ahead of the competition by focusing on speed, security, scalability, reliable payment gateways, and a platform that supports compliance for hemp-derived products. While keeping these factors in account, most merchants may prefer to migrate a CBD store from WooCommerce to Shopify for better performance and easier management.
What is the Best Ecommerce Platform for Selling CBD?
As the CBD industry continues to grow rapidly in the United States, the online hemp-product retailers have to handle the increasing traffic and customer expectations. According to Statista, the CBD market in the United States is expected to be worth billions, and merchants should choose the right platform to stay relevant yet competitive in such a market.
Most of the CBD businesses prefer WooCommerce for offering flexibility and lower upfront costs. However, as stores expand, challenges like plugin conflicts, website maintenance, slow loading speeds, and security vulnerabilities become difficult to manage. This is where Shopify becomes an attractive alternative.
To help you get started, we have written this comprehensive guide on how to migrate your CBD store from WooCommerce to Shopify by following a step-by-step method. We will also talk about some common challenges and why it is worth it to shift your CBD store from WooCommerce to Shopify.
Step #1: Planning to Migrate Your WooCommerce Store’s Content to Shopify
Once you have successfully created your Shopify store, go to your WooCommerce store and decide what content you wish to move to Shopify. In some cases, businesses may prefer to design new elements. However, the type of content you might want to migrate may include:
- Customers
- Historical orders data that have been fulfilled already
- Products
- Reviews
Furthermore, you may also have to decide how you want to transfer each type of data from WooCommerce to Shopify. Here are a few options:
- Manually Copy-Pasting Content: Copy the text, images, and other content elements from your WooCommerce store and simply paste them into your Shopify store.
- Using Store Migration App: Store Migration App by Shopify offers a seamless way to transfer your WooCommerce store data to Shopify.
- CSV Import: Another convenient way is to transfer all your data into a CSV file and then import it into your new Shopify store. However, some data may not be conveniently transferable by this method.
- Partner With an Expert: The most convenient option is to hire a Shopify expert to migrate your CBD data to Shopify without any technical difficulties.
How to Migrate a WooCommerce Theme to Shopify
Now that we have previewed the WooCommerce store and decided what to move and how to move, the next step is to take a look at your Shopify store. If you want to bring the same outlook of your CBD store from WooCommerce to Shopify, then simply follow these steps:
- When you go to the sign-up page on Shopify, select the option “I’m already selling online or in person” when your WooCommerce store is already active.
- Then a question will appear on your screen, “Which platform are you moving from?” and here you have to select WooCommerce.
- Once your store is created, go to the Shopify Admin on the Home page, and click Theme store from the Set up your store tab.
- Now in the Create your own theme section, paste your WooCommerce store’s URL and click Create.
By following these steps a new theme will be created in Shopify with an outlook based on your existing CBD WooCommerce store. The custom templates will be similar to the existing storefront on WooCommerce. You can also select a new theme from the Theme store section.
How to Use the Shopify Store Migration App?
The Shopify Migration app is an early access feature available exclusively for certain types of stores, and it is limited to the desktop version only. The Store Migration app works as a third-party service that allows you to seamlessly import products from WooCommerce to Shopify in just a few clicks.
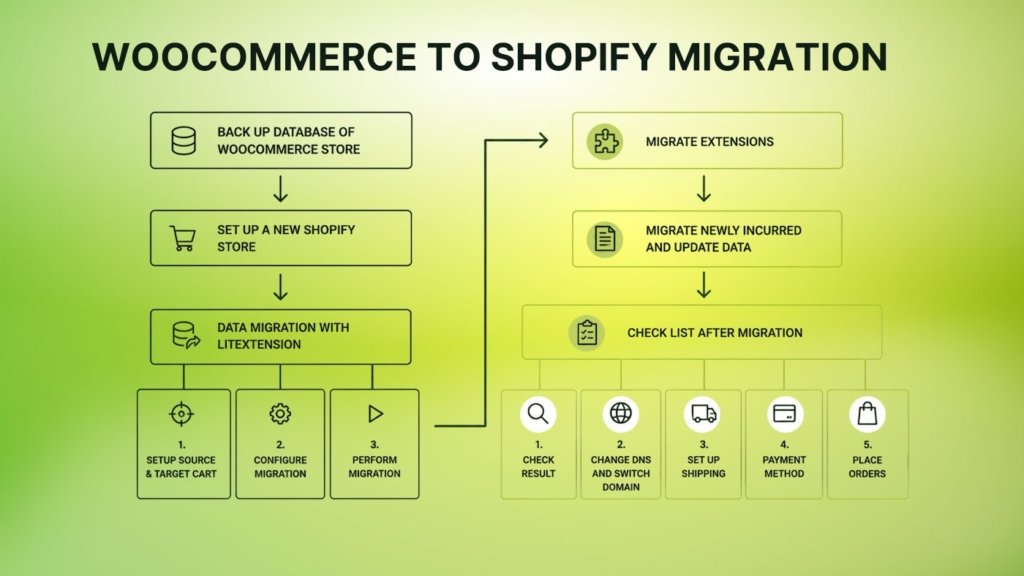
NOTE: Keep in mind that the Shopify Store Migration app allows for 3 product options. Any product having more than 3 product options won’t have its options imported.
Here is how to use the Store Shopify Migration App:
- Sign up on Shopify and go with the free trial option.
- Select WooCommerce on the screen where it asks Are you currently selling through another platform?
- Once your store is created, go to the store’s admin panel and install the Shopify migration app.
- After installing the Shopify Migration App, export your products from WooCommerce in a CSV file format.
- Now upload this CSV file to the Shopify Store Migration App.
- Once the CSV is uploaded on Shopify Store Migration App, click Import to start the data migration process.
- Finally, when the import process is completed from the CSV file, all the imported files or data will display on the screen.
If you don’t know how to import data from WooCommerce into a CSV file, then follow the next steps. It is recommended to follow the steps further, as the steps mentioned above were just an introduction on how to migrate data using the Shopify Store Migration App.
Step #2: Export Product Data from WooCommerce to Shopify
Exporting CBD products data from WooCommerce to a CSV file is done automatically and you don’t have to add anything manually in the spreadsheet. Here is how you can export product data from WooCommerce to Shopify:
- Go to your WooCommerce store account and select All Products > Products.
- Click the Export button and select the following columns from the dialog box:
- Choose the columns of products you want to export.
- Select the categories of these products that you wish to export.
- If you want to export all data, select Yes, export all custom meta.
- Finally, select Generate CSV.
- Now rename the CSV file as WooCommerceProductsCBD.csv and save this file on your desktop.
Step #3: Edit the Exported Data from WooCommerce
Before uploading the CSV file and starting the import process on Shopify, you have to make some edits to this data.
Edit your WooCommerceProductsCBD.csv to match the format with Shopify. In this case, you might want to work in another tab instead of editing the existing file. Simply copy the columns from your WooCommerce CSV file into another file and change the data formatting to the Shopify product CSV template.
You can use Google Sheets or Microsoft Excel to make changes in the CSV file that you need to upload to Shopify. Let’s give you an example of the data formatting difference. Keep in mind that the data shared in the example below may contain columns that can be seen in Shopify’s CSV template, which may not be available in the WooCommerce data file:
| WooCommerce Data Type | Shopify Data Type | What You Need to Do |
| Name | Title | Need to update the column name to Shopify’s data type |
| Description | Body (HTML) | Need to update the column name to Shopify’s data type |
| Attribute Name1 | Option1 Name | Need to update the column name to Shopify’s data type |
| Attribute 1 value(s) | Option1 Value | Need to update the column name to Shopify’s data type. In case your WooCommerce Attribute 1 value(s) have multiple options, then you will have to create rows for different options. You can add only one option in each row. |
| Attribute 2 name | Option2 Name | Need to update the column name to Shopify’s data type |
| Attribute 2 value(s) | Option2 Value | Need to update the column name to Shopify’s data type. In case your WooCommerce Attribute 2 value(s) have multiple options, then you will have to create rows for different options. You can add only one option in each row. |
| SKU | Variant SKU | Need to update the column name to Shopify’s data type |
| Weight (lbs.) | Variant Grams | Convert this data to grams by multiplying the value in the WooCommerce file by 453.6, then change the column name in Shopify’s data type. |
| Stock | Variant Inventory Qty | Need to update the column name to Shopify’s data type |
| Regular price | Variant Price | Need to update the column name to Shopify’s data type |
| Images | Image Src | Need to update the column name to Shopify’s data type |
Step #4: Importing Product Data on Shopify Store
Once you have made changes to your WooCommerceProductsCBD.csv and made edits according to Shopify’s data format, the next step is to import the product data into Shopify.
- Go to the Admin panel of your Shopify store and select ‘Products’.
- Click Import and then select the option ‘Add File’ to upload the WooCommerceProductsCBD.csv.
- Uncheck the option Publish new products to all sales channels and select Upload and preview.
- Review the details of the import data process and then select Import products. Once your CSV has been uploaded, you will receive a confirmation email from Shopify that the email account that you used to create the Shopify store.
Step #5: Verify and Organize New CBD Products After Importing
Once you have uploaded all the CBD product data to Shopify, verify that all the information is formatted correctly. Check for the information such as price, weight, and inventory as it can impact your business if this information is not uploaded correctly.
Here for Common Errors that Might Occur During Import
| Issue | How to Resolve |
| Products got uploaded successfully but did not publish on Shopify | The products that you imported could be hidden. In this case, you have to make them on your sales channels on Shopify. |
| Products are missing key details on Shopify. | Review the product descriptions on the product page and then proceed to fill out the rest of the information. |
| Product variants do not import | If one or more product variants are missing, then they may not have imported successfully. In this case, add these variants for the products manually on Shopify. |
Step #6: Export Customer Data from WooCommerce to Shopify
For most of the CBD business, exporting the customer data might mean as much as your website’s data. The process is pretty straightforward. All you have to do is install the Import Export Suite plugin on your WooCommerce store. Once you have, just follow these steps:
- Go to your WooCommerce and access the Import Export Suite and click ‘Export’.
- A dialog box will open where you have to select User/Customer from the dropdown menu.
- Now, click Select an export method and a new dialog box will open where you have to choose Advanced options/Batch export/Scheduling.
- Now the plugin will redirect you to another dialog box where you have to select Export guest users, then click ‘Yes’.
- Name the export file as WooCommerceCustomerData and save the file as CSV on your desktop.
- Select the export format as CSV and then select the Delimiter, which is used to differentiate data in raw form. Then click Export.
Step #7: Editing Customer Data to Upload on CBD Shopify Store
Like the product data, it is not possible to directly upload the customer data to the CBD Shopify store without editing the file to make it compatible with the Shopify template. Because if you directly upload the customer data CSV file to Shopify, it won’t support the format.
Therefore, you have to create a new CSV file where you have to paste the customer data from the WooCommerce CSV file but in Shopify’s compatible format. Simply follow the example mentioned below:
| WooCommerce Data Type | Shopify Data Type | Action |
| first_name | First Name | Update the column as per Shopify’s data type |
| last_name | Last Name | Update the column as per Shopify’s data type |
| user_email | Update the column as per Shopify’s data type | |
| billing_company | Default Address Company | Update the column as per Shopify’s data type |
| billing_address_1 | Default Address Address1 | Update the column as per Shopify’s data type |
| billing_address_2 | Default Address Address2 | Update the column as per Shopify’s data type |
| billing_city | Default Address City | Update the column as per Shopify’s data type |
| billing_state | Default Address Province Code | Update the column as per Shopify’s data type. This column has a dedicated ISO code for the province or state that is attached to the customer’s data. |
| billing_country | Default Address Country Code | Update the column as per Shopify’s data type. This column has a dedicated ISO code for the province or state that is attached to the customer’s data. |
| billing_postcode | Default Address Zip | Update the column as per Shopify’s data type |
| billing_phone | Phone | Update the column as per Shopify’s data type |
Step #8: Import Customer Data on Shopify
Once you have updated the customer data according to Shopify’s format and made any necessary changes, the next step is to upload this data to your CBD Shopify store:
- Go to your Shopify store’s admin panel.
- Select the Customer tab and click Import.
- Click the Add File option and select the updated CSV file.
- Now select the Import Customers option and review all the details and then again click Import Customers.
- Finally, you will have the summary of all customers on your screen, which you can review by clicking View all customers.
Step #9: Import Review from WooCommerce to Shopify
Migrating the customer reviews from your WooCommerce CBD store to your Shopify CBD store is not possible. But there is an option to import your customer reviews manually with the help of a third-party application from Shopify’s App Store.
Here is an app useful for importing your CBD customer reviews:
Step #10: Redefine the Outlook of Your Website
Now the steps we followed copied the same outlook of the CBD WooCommerce store for the Shopify CBD store. However, you can give your CBD Shopify Store a new outlook by selecting the Theme option from your admin panel.
Here you can find various ready-made themes for free or buy the paid ones from the Shopify Theme Store. But keep in mind that paid themes have to be purchased in advance before you can publish them online.
Step #11: Set Up the Shipping Method for the CBD Shopify Store
At this step, you have to define the shipping rates and shipping methods before you can launch your store officially. Just follow these steps:
- Review the address of your CBD Shopify store to learn about the right shipping rates based on the location of your store. If there are other locations from where you conduct business, you can also add those locations for a better estimation of the shipping rates.
- Then you have to create new shipping zones to allow shipping from different regions, zones, or states (if you are operating as a multi-region business).
- If you are applying the carrier-calculated shipping rates, then you have to configure the shipping based on dimensions. Most of the carriers use the volumetric weight concept (the height, weight, and depth of a package) to define the shipping rates.
- Now set up the shipping rates for the shipping zones that you have defined.
- Choose a shipping strategy that suits your business the best.
- Finally, decide how you wish to fulfill your orders. You can either ship the orders yourself or use a fulfillment method to ship the CBD products for you.
As for the CBD products, your options might become limited. At this point, it’s best to reach out to the shipping carriers and define your business category to avoid any loss after the product has been sent for shipping.
Step #12: Set Up Your Taxes
Imposing the sales tax is important in the CBD business to manage the additional charges imposed by the government, depending on the location. Since every state or region have their own figures regarding the sales tax or any other type of charges. But at the same time, you should also be familiar with Shopify’s tax setup process.
How to Define the Taxes?
The shipping rates on the CBD products are applied based on your customer’s provincial, state, or regional tax regulations. In other words, the taxes may vary depending on where you deliver your CBD products. You can also go with the tax override in order to manually adjust the taxes.
How to Keep Track of Your Taxes?
To keep your business running successfully without the IRS knocking on your door, you have to keep the tax records throughout the year. No need to hire an accountant, you can simply do all the tax calculations by using the accounting apps from Shopify’s store.
Step #13: Set Up the Payment Gateway for CBD Sales
Probably the most crucial yet challenging point in setting up your CBD Shopify store is integrating the right and compliant payment method. Since CBD is considered a high-risk industry by most of the payment gateway providers, you may have to do some research.
Tip: The third-party payment gateways may charge you a substantial amount for each transaction. So make sure to take your time with finding the right payment partner.
How to Set Up the Checkout for CBD Products
- Once you have decided on the order fulfillment and your payment method, add your store’s policies on the checkout page.
- You can edit the checkout page by accessing the customer information settings and selecting the option if you want to collect email addresses of your customers to send newsletters, event updates/offers.
Step #14: Place Test Orders
Now that everything has been configured and is ready to launch, you can place some test orders to see that everything, including the calculations, is working properly. Here are some test cases you can apply to place test orders:
- Archiving a successful order
- Completing a successful and a failed transaction
- Fulfilling or partially Fulfilling an order
- Refunding and canceling an order
Once you place the test orders to create, refund, and fulfill orders, you will receive the emails based on the addresses provided in your test orders. You can review these emails to make any updates or changes to email notifications by editing the templates via the Shopify admin panel.
Step #15: Set Up the Domain Name
While setting up your CBD Shopify store, you get the option to purchase a new domain or transfer the previous one (which you may have used for a WooCommerce CBD store) to associate with Shopify. Here is how you can purchase a domain:
- You get the option to purchase a domain via Shopify.
- Set your CBD Shopify store web address as your primary domain, which can display in the search results, browsers, and social media.
- Set up the email forwarding so that when a customer wants to reach out to you, everything looks official.
And that’s pretty much it. Your CBD Shopify Store is ready to make sales, and everything from your existing CBD WooCommerce store is now transferred to Shopify.
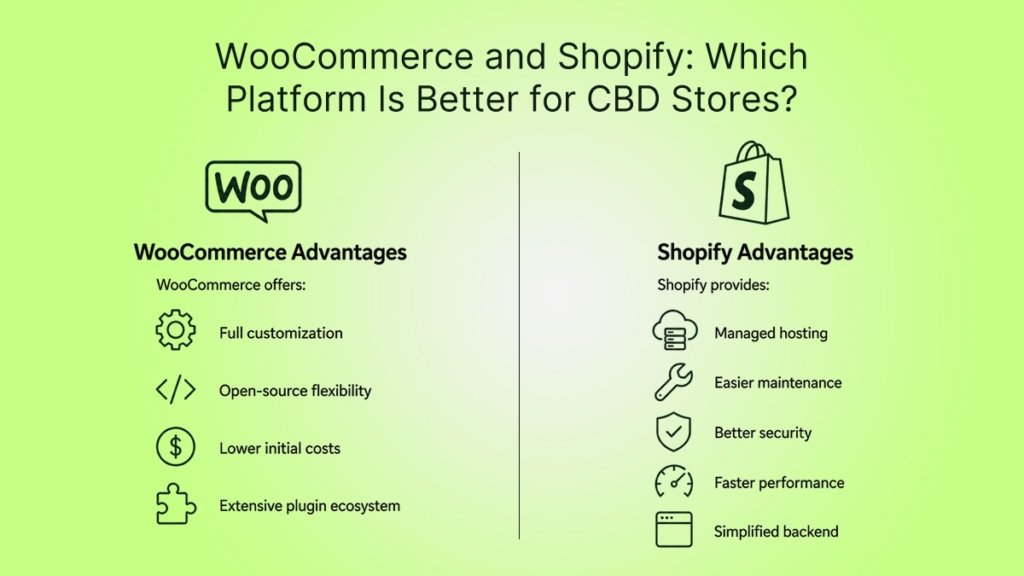
WooCommerce and Shopify: Which Platform Is Better for CBD Stores?
Many merchants compare WooCommerce and Shopify before making the switch.
WooCommerce Advantages
WooCommerce offers:
- Full customization
- Open-source flexibility
- Lower initial costs
- Extensive plugin ecosystem
However, technical management becomes difficult as stores grow.
Shopify Advantages
Shopify provides:
- Managed hosting
- Easier maintenance
- Better security
- Faster performance
- Simplified backend
For scaling CBD brands, Shopify often becomes the more practical long-term solution.
Can You Use Shopify WooCommerce Integration Instead of Full Migration?
Some businesses explore Shopify WooCommerce integration rather than a complete migration.
When Integration Makes Sense
Integration may work if:
- You want to test Shopify gradually
- You operate multiple storefronts
- You need separate systems temporarily
When is Full Migration Better?
Complete migration is usually better when:
- WooCommerce maintenance becomes overwhelming
- Site speed issues hurt sales
- Security concerns increase
- Scaling becomes difficult
Most growing CBD brands eventually choose full migration to simplify operations.
How Long Does WooCommerce Migration to Shopify Take?
Migration timelines vary based on store size.
Small CBD Stores
Small stores with limited products may migrate within a few days.
Large CBD Stores
Larger stores with thousands of products, custom integrations, and extensive SEO structures may take several weeks.
Factors Affecting Migration Time
Key factors include:
- Product volume
- Custom functionality
- SEO complexity
- Design customization
- Data cleanup requirements
Conclusion
If your CBD business struggles with plugin conflicts, security maintenance, slow website performance, or technical complexity, it may be time to migrate CBD store from WooCommerce to Shopify.
Shopify offers a streamlined ecommerce experience that helps CBD brands focus on growth instead of technical management. From faster page speeds and mobile optimization to secure hosting and scalable infrastructure, Shopify provides significant advantages for modern CBD businesses.
A successful WooCommerce to Shopify migration requires careful planning, SEO preservation, compliant payment setup, and thorough testing. When done correctly, the transition can improve customer experience, increase conversions, and position your CBD brand for long-term success in the competitive U.S. ecommerce market.
Frequently Asked Questions
Is Shopify CBD-friendly?
Yes, Shopify allows hemp-derived CBD products in the United States when merchants follow applicable laws and use approved payment gateways.
Will I lose SEO rankings after migration?
Proper redirects and SEO preservation strategies help maintain rankings during migration.
How difficult is migrating from WooCommerce to Shopify?
The difficulty depends on your store size and complexity. Small stores can migrate relatively easily, while large stores may require professional assistance.
Can Shopify handle subscription-based CBD sales?
Yes. Shopify supports subscription apps that work well for recurring CBD purchases.
How long does a Shopify migration take?
Migration timelines vary from a few days to several weeks depending on store complexity.